
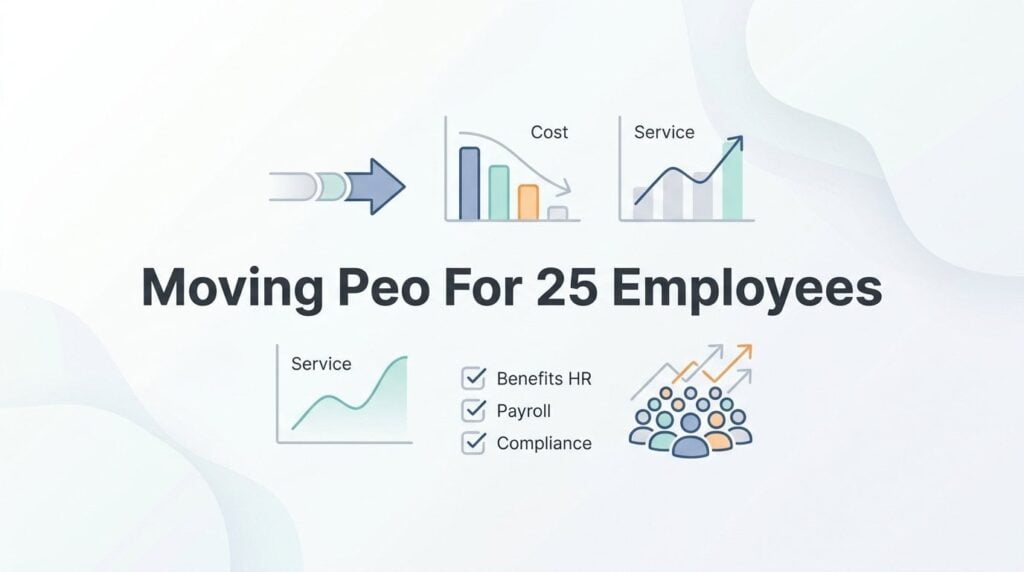
At 25 employees, switching PEOs is genuinely different from what a 5-person startup or a 200-person company faces. You’re past the point where a bad HR setup is just an inconvenience. Payroll errors, compliance gaps, and a weak benefits package have real consequences for retention and operations. But you’re also not big enough to absorb months of transition chaos or eat the cost of a botched move.
The good news: a 25-person company is actually in a strong negotiating position when moving PEOs. You’re meaningful enough to get competitive pricing and real attention from providers, but nimble enough to execute a clean transition if you plan it right.
This guide covers the specific strategies that make a PEO move work at your headcount. Not generic advice that applies to any company size, but tactics shaped by the realities of a 25-employee organization. We’ll cover timing, contract exit, benefits continuity, pricing leverage, and how to avoid the most common mistakes that derail transitions at this size.
1. Exit Your Current Contract Without Getting Burned
The Challenge It Solves
Most business owners don’t read their PEO contract carefully until they’re ready to leave. That’s when they discover termination notice windows, tail coverage obligations, and minimum headcount clauses that can turn a clean exit into an expensive one. At 25 employees, a surprise $10,000–$20,000 exit penalty or an unexpected workers’ comp tail bill can meaningfully affect your transition economics.
The Strategy Explained
Pull your current PEO contract and read the termination section before you do anything else. Look specifically for three things: the required notice window (commonly 30 to 90+ days), any tail coverage obligations for workers’ comp claims that remain open under the outgoing PEO’s master policy, and minimum headcount clauses that could trigger penalties if you’re near a threshold.
Notice windows matter because they determine your earliest realistic transition date. If your contract requires 60 days’ written notice and you’re targeting a January 1 start with a new PEO, you need to give notice by November 1 at the latest. Miss that window and you’re either paying for two PEOs simultaneously or delaying your transition by a full quarter.
Implementation Steps
1. Locate your original PEO agreement and identify the termination clause, notice period, and any auto-renewal language.
2. Check for workers’ comp tail coverage language — specifically, who is responsible for open claims that exist at the time of termination.
3. Identify whether your contract includes a minimum headcount clause and whether you’re currently near that threshold.
4. Calculate your earliest eligible exit date based on the notice requirement and map it against your target transition timeline.
5. If anything is unclear, request written clarification from your current PEO before giving notice — verbal assurances don’t hold up.
Pro Tips
Don’t give notice until you have a signed agreement with your incoming PEO. Giving notice prematurely can damage the relationship with your current provider and leave you in a gap if the new deal falls through. Keep the process quiet until you’re committed on both ends.
2. Time the Move Around Your Benefits Renewal Window
The Challenge It Solves
Health insurance plan years are typically fixed — either January through December or tied to your PEO’s master plan renewal date. Moving mid-year creates a cascade of problems: potential COBRA obligations, coverage gaps for employees, and the possibility of paying duplicate premiums during an overlap period. At 25 employees, these aren’t abstract compliance risks. They’re real costs and real employee relations problems.
The Strategy Explained
The cleanest PEO transitions happen when the switch aligns with a benefits renewal date. This is the single most important timing variable for companies at your headcount. Moving on January 1 — the most common plan year start — gives you a natural break point where employees move from one benefits plan to another without a gap or a confusing mid-year enrollment event.
There’s also a regulatory consideration worth knowing. At 25 employees, depending on your state, you may sit near the ACA small group and large group threshold. That line affects plan availability, pricing, and what coverage options your new PEO can offer. It’s worth confirming which category you fall into before you commit to a new provider, because the plan options may differ from what you have now.
Implementation Steps
1. Identify your current health plan year start and end dates — check your benefits documents or ask your current PEO directly.
2. Confirm whether your state classifies your company as a small group or large group employer at 25 employees, as this affects your plan options.
3. Work backward from your target benefits renewal date to set a realistic transition timeline, accounting for your contract notice window.
4. Ask prospective PEOs whether their benefits offerings change based on group size classification, and confirm what plans would be available to you specifically.
5. If a mid-year move is unavoidable, get a clear written plan from the incoming PEO for how they’ll handle the coverage transition and any COBRA obligations.
Pro Tips
Start the evaluation process at least four to six months before your benefits renewal date. That sounds like a long runway, but between contract review, provider comparisons, negotiations, and implementation, the time moves fast. Companies that start in October for a January 1 transition often feel rushed. Starting in August gives you breathing room.
3. Run a Real Cost Comparison Before You Commit
The Challenge It Solves
PEO pricing is genuinely confusing, and it’s designed to be. Providers use different fee structures — some charge per employee per month (PEPM), others charge a percentage of payroll — and neither model surfaces all the costs upfront. At 25 employees with moderate wages, the difference between these models can be significant, and fees that look small individually add up across your headcount.
The Strategy Explained
To compare providers accurately, you need to convert everything to a common denominator: total annual cost per employee. That means getting the base administration fee, the benefits administration markup, the HR platform access fee, and any workers’ comp markup above standard NCCI rates — all in writing, from every provider you’re evaluating.
The fees most providers don’t surface upfront include benefits administration charges layered on top of the base PEPM, setup or implementation fees, and charges for HR services you’d assume are included. Ask each provider to give you a complete fee schedule, not just the headline rate. If they resist, that tells you something.
For a deeper breakdown of how PEO pricing structures work and what to watch for, the PEO Metrics comparison framework walks through the fee components that matter most at different headcount levels.
Implementation Steps
1. Gather your current payroll data: total annual payroll, average salary, and employee count breakdown by classification.
2. Request itemized fee schedules from each prospective PEO — base admin fee, benefits admin, platform access, workers’ comp handling, and any one-time fees.
3. Convert all quotes to a consistent format: total annual cost divided by employee count to get cost per employee per year.
4. Add your current benefits premium costs to the comparison so you’re evaluating the full picture, not just the admin fee.
5. Identify any costs that are variable or escalate over time — percentage-of-payroll models get more expensive as you grow, which matters if you’re planning to hire.
Pro Tips
Don’t accept a proposal that bundles everything into one number. If a provider can’t or won’t break out their fee components, walk away. Transparency in the sales process is a reasonable proxy for transparency in the ongoing relationship.
4. Protect Your Workers’ Comp Continuity During the Switch
The Challenge It Solves
Workers’ comp is one of the most overlooked risks in a PEO transition. Under the co-employment model, your coverage runs under the PEO’s master policy. When you leave, open claims stay with the outgoing PEO’s insurer. New claims need to transfer to the incoming PEO’s coverage. The gap between those two realities — even if it’s just a few days — is where problems happen.
The Strategy Explained
There are three specific workers’ comp issues to address during a PEO transition. First, open claims: any workers’ comp claim filed before your transition date remains under the outgoing PEO’s policy, and you need written confirmation of how those will be handled and by whom. Second, class code continuity: if your workforce includes employees in different job classifications, confirm that the incoming PEO assigns the same class codes. Misclassification can affect your premium and, in some cases, your coverage. Third, your experience modification rate, or e-mod: ask your outgoing PEO for a loss history letter that documents your claims history. Some PEOs provide this readily; others push back. Get it regardless.
Implementation Steps
1. Request a list of all open workers’ comp claims from your current PEO before giving notice.
2. Confirm in writing with the outgoing PEO how open claims will be managed after your termination date.
3. Request a loss history letter or equivalent documentation of your claims history to bring to the incoming PEO.
4. Provide the incoming PEO with your full job classification list and confirm their class code assignments match your current setup.
5. Confirm the exact date your coverage transfers to the incoming PEO’s policy and ensure there is no gap — even a single day without coverage is a real risk.
Pro Tips
If you have employees in physically demanding roles — field workers, warehouse staff, or anyone in a higher-risk classification — pay extra attention to class code assignment. A reclassification at transition can spike your workers’ comp premium in ways that undermine the cost savings you were expecting from the move.
5. Negotiate Like You Have Leverage — Because You Do
The Challenge It Solves
Many business owners at 25 employees assume they’re too small to negotiate meaningfully with a PEO. That’s wrong. National PEOs often have minimum headcount thresholds that make smaller accounts less attractive, but regional and mid-market PEOs actively compete for accounts at your size. That competitive dynamic gives you real leverage — if you use it correctly.
The Strategy Explained
The most effective negotiating tool is a competing offer. Get quotes from at least two or three providers before you engage in serious negotiation with any of them. When a provider knows they’re competing, they’re more flexible. When they think they’re the only option, they’re not.
At 25 employees, the items that are genuinely negotiable include implementation and setup fees (often $1,000–$3,000 that can be waived or reduced), rate lock periods that protect you from mid-contract price increases, minimum headcount clauses that could penalize you if you have turnover, and the service tier you’re assigned — specifically whether you get a dedicated account manager or a shared service model.
Implementation Steps
1. Get quotes from a minimum of three providers before entering serious negotiation with any one of them.
2. Identify the specific line items you want to negotiate: setup fees, rate lock, minimum headcount clause, and dedicated account manager access.
3. Use competing offers as leverage — you don’t need to share exact numbers, but you can tell a provider that another quote is more competitive and ask if they can do better.
4. Ask for a rate lock of at least 12 months, ideally 24. PEO pricing can increase at renewal, and locking your rate gives you cost predictability.
5. Get all negotiated terms in writing before you sign. Verbal commitments from sales reps don’t survive implementation.
Pro Tips
Don’t negotiate on price alone. A lower PEPM rate that comes with a shared service model and no dedicated account manager can cost you more in operational friction than the savings are worth. Negotiate for the full package: price, service level, and contract flexibility.
6. Communicate the Transition to Your Team Without Creating Panic
The Challenge It Solves
At 25 employees, your organization is tight-knit. Rumors travel fast, and HR changes are the kind of thing people talk about. If employees hear about a PEO switch before you’ve communicated it clearly, the gap fills with speculation — and the speculation is almost always worse than the reality. Retention risk is real at this size, where losing two or three people during a transition can materially affect operations.
The Strategy Explained
Employees care about three things during a PEO switch: their paycheck, their benefits, and who handles HR questions going forward. Your communication strategy should address all three directly, in plain language, before people have a chance to wonder.
A structured communication timeline works better than a single all-hands announcement. Start with a brief announcement that explains what’s changing and why, framed around what improves for employees. Follow up with a written FAQ that answers the specific questions people will actually ask: Will my paycheck change? Will my health insurance change? Who do I call if I have a question? Then send a confirmation message once the transition is live, confirming everything went smoothly.
Implementation Steps
1. Prepare your announcement message before you tell anyone — including managers. Control the narrative from the start.
2. Brief your managers first, at least 24–48 hours before the broader team announcement, so they can answer questions confidently rather than saying they don’t know.
3. Send the team announcement with a clear, honest explanation of why you’re making the change and what improves as a result.
4. Distribute a written FAQ that addresses paycheck continuity, benefits continuity, and the new HR contact process.
5. Send a go-live confirmation on day one of the new PEO relationship, confirming the transition is complete and who to contact with questions.
Pro Tips
Avoid vague corporate language in your communication. “We’re upgrading our HR infrastructure” lands poorly with a 25-person team. Something like “We’re switching to a provider that gives us better benefits options and more responsive HR support” is more honest and more reassuring. People respond to specifics, not positioning.
7. Validate the New PEO’s Service Model Before Day One
The Challenge It Solves
The gap between what a PEO promises in the sales process and what they actually deliver post-implementation is one of the most common complaints from companies that have been through a PEO switch. By the time you realize the service model doesn’t match what you were sold, you’re already locked into a contract. At 25 employees, you don’t have a large HR team to absorb the slack when a PEO underperforms.
The Strategy Explained
Before you sign, do a few things that most companies skip. Ask to speak with current clients at a similar headcount — not references hand-picked by the sales team, but companies you find through your own network or LinkedIn. Ask those references specifically about response times, account manager turnover, and how issues get resolved when something goes wrong.
Also confirm the service model in writing. Some PEOs assign dedicated account managers only above certain headcount thresholds. At 25 employees, you may be in a shared service model where you’re calling a general support line rather than reaching someone who knows your account. That’s not always a dealbreaker, but it’s something you should know before you sign, not after.
Implementation timelines typically range from two to eight weeks depending on provider complexity. Get a written implementation schedule with named milestones and confirm who owns each step on their side.
Implementation Steps
1. Ask the incoming PEO to confirm in writing whether you’ll have a dedicated account manager and what their response time commitments are.
2. Request references from current clients at 20–30 employees — and reach out to them with specific questions about post-implementation service quality.
3. Get a written implementation timeline with clear milestones, responsible parties, and go-live date confirmation.
4. Confirm the data migration process: how employee records, payroll history, and benefits enrollment data will transfer, and who validates accuracy.
5. Schedule a 90-day review meeting before you sign — put it on the calendar as part of the agreement so there’s a built-in accountability checkpoint after implementation.
Pro Tips
The 90-day review isn’t just a formality. Use it to evaluate response times, payroll accuracy, benefits administration quality, and whether the service model matches what you were promised. If there are gaps at 90 days, you want to surface them while you still have leverage to demand correction — not at month 18 when you’re locked in and frustrated.
Putting It All Together
Moving a PEO at 25 employees is manageable, but it rewards preparation. The companies that struggle through these transitions usually skipped one of a few things: they didn’t read their exit clause carefully, they moved at the wrong time of year, or they didn’t validate the new provider’s service model before committing.
The ones that come out ahead treated the move like a business decision, not an HR project. They compared multiple providers, ran the full cost math, and used their headcount as negotiating leverage. Those aren’t complicated moves. They just require doing the work before you sign anything.
A few priorities if you’re starting this process now. Read your current contract first — know your notice window and exit obligations before you talk to anyone else. Then align your target start date with your benefits renewal window. Then get at least three quotes and compare them on a total-cost basis, not just the headline rate.
If you’re actively evaluating options, Don’t auto-renew. Make an informed, confident decision. PEO Metrics can help you run a side-by-side comparison of providers based on real pricing and service data, so you’re not guessing at what a fair deal looks like. Start there before you sign anything.
Before you sign that PEO renewal, make sure you’re not leaving money on the table.
Many businesses unknowingly overpay because of bundled fees, hidden administrative markups, and contracts designed to limit flexibility. We give you a clear, side-by-side breakdown of pricing, services, and contract terms—so you can see exactly what you’re paying for and choose the option that truly fits your business.
