
If your business has mixed job roles, you’re probably overpaying for workers’ comp right now. Not because of bad luck with claims, but because the wrong employees are sitting in the wrong class codes, and nobody has stopped to fix it.
This is especially common in construction, manufacturing, field services, and any operation where people wear multiple hats. A project manager who occasionally walks a job site. An office coordinator who sometimes helps with light assembly. These dual-duty situations get defaulted into the highest-risk code because it’s simpler for whoever is doing the classification. Simpler for them. More expensive for you.
When you move to a PEO arrangement, class code assignments get re-evaluated under the PEO’s master policy. That’s either a genuine opportunity to clean up your classifications and reduce your cost basis, or a hidden trap where vague bundled pricing obscures what you’re actually paying per code. Most business owners don’t know which one they’re walking into because they never built the cost model to find out.
This guide walks through the operational process: auditing your current codes, mapping roles correctly, understanding how PEO master policies change the math, building a comparison model, negotiating transparency with your PEO, and setting up an annual validation cadence so the savings hold. If you’ve already covered the foundational ground on PEO risk structures, this is where you get into the actual mechanics.
We’re not talking about gaming the system. Misclassification cuts both ways, and states audit this. We’re talking about accuracy, and accuracy in class code assignments is one of the most overlooked cost levers available to businesses that run PEO arrangements.
Let’s work through it step by step.
Step 1: Pull Your Current Class Code Assignments and Loss Runs
You can’t model anything without a baseline. The first thing you need is a clear picture of how your employees are currently coded and what your claims history looks like.
Start by requesting your experience modification worksheet from your current carrier or PEO. This document shows your three-year loss history, your expected losses by class code, and how your experience mod was calculated. If you’re already with a PEO, ask specifically whether your company’s individual mod was used or whether you’re folded into the PEO’s master policy mod. That distinction matters more than most people realize, and we’ll come back to it in Step 3.
Next, pull your loss runs. These are detailed reports of every workers’ comp claim filed over the past three to five years, including open reserves. You want to see which claims are tied to which job functions, and whether the class codes on those claims actually match the roles involved. Discrepancies here are more common than you’d expect.
Then get your current class code schedule. This should list every class code your company is rated under, the payroll allocated to each code, and the rate per $100 of payroll. If your PEO or carrier can’t produce this in a clean format, that itself is a red flag worth noting.
What you’re looking for at this stage: employees who are clearly low-risk but sitting in a broad or high-risk code. The most common version of this is office staff or project managers coded under the same classification as field labor. In construction especially, the rate difference between clerical work and hands-on trade work can be substantial. Clerical employees who qualify under class code 8810 should almost never be rated under a construction trade code, but this happens regularly when initial classifications are done quickly or carried over without review.
Also flag any “catch-all” codes that seem to have absorbed a large portion of your payroll without a clear rationale. These are often signs that whoever set up the account took the path of least resistance rather than doing the detailed role analysis.
Document everything you find in this step. You’ll use it as the comparison baseline throughout the rest of this process.
Step 2: Map Every Role to Its Correct NCCI or State-Specific Class Code
This is the most technically demanding step, and it’s where the real money is found or lost.
Most states use NCCI (National Council on Compensation Insurance) class codes, which are defined in the Scopes Manual. That manual describes in detail what work each code covers, including what qualifies and what doesn’t. But several states operate under independent bureaus, including California, Delaware, New Jersey, New York, and Pennsylvania. If you operate in one of those states, the codes and rules may differ from NCCI standards, and you can’t assume NCCI logic applies directly.
Then there are the monopolistic states: Ohio, Washington, Wyoming, and North Dakota. In those states, workers’ comp is administered through a state fund, and PEO arrangements work differently. If you have employees in any of these states, the class code analysis still applies, but the pricing mechanism and the PEO’s role in it are distinct.
For the mapping itself, the governing classification rule is your starting point. An employee’s class code is determined by their principal occupation, meaning the work they spend the majority of their time doing. Occasional tasks that fall outside that primary role don’t automatically change the classification. A warehouse worker who sometimes handles administrative emails is still a warehouse worker for classification purposes.
The important carve-out here is the standard exceptions rule. Certain class codes apply regardless of the employer’s governing classification. Clerical office employees (8810) and outside sales staff (8742) are the primary examples. If an employee genuinely qualifies under one of these codes based on their actual duties, they should be coded there, even if the rest of your workforce is in a high-risk trade classification. This is one of the most commonly missed savings opportunities in mixed-role businesses.
For dual-duty employees, the analysis gets more nuanced. You need to document what percentage of their time is spent on each type of work. Some states and carriers allow payroll splitting between codes for employees with genuinely divided duties, though this requires clear documentation and isn’t universally permitted.
Build a spreadsheet that maps every role in your business to its proposed class code. Include the job title, a brief description of actual duties, estimated time allocation by function, and the code you believe applies. This document becomes your negotiating tool in Step 5.
One practical note: PEOs sometimes default to the highest-risk applicable code when there’s ambiguity. It’s not necessarily malicious, it’s often just the path of least resistance during onboarding. Your job is to bring enough documentation that ambiguity doesn’t work against you.
Step 3: Understand How the PEO’s Master Policy Changes the Math
This is where PEO workers’ comp gets genuinely complicated, and where a lot of businesses make expensive assumptions.
Under a PEO arrangement, your employees are co-employed and covered under the PEO’s master workers’ comp policy. That policy covers multiple client companies, which means risk is pooled. The implications of that pooling depend heavily on your specific situation and the PEO’s pricing model.
There are two main pricing structures to understand. Pass-through pricing means the PEO charges you the actual carrier rate for your class codes, plus a separate admin fee. The workers’ comp cost is transparent and tied directly to your payroll and classifications. Bundled pricing folds workers’ comp into a per-employee or percentage-of-payroll admin fee, which makes it much harder to see what you’re actually paying per class code. Bundled models aren’t inherently bad, but they create opacity that makes class code accuracy harder to verify and negotiate.
The experience modification rate question is critical. Your company’s EMR is calculated by the rating bureau based on your three-year claims history compared to expected losses for your class codes. Under a PEO, there are two scenarios: either your individual mod carries over and applies to your portion of the master policy, or the PEO applies their own master policy mod to your account.
If your loss history is clean, your individual mod is likely better than the PEO’s blended rate, especially if the PEO serves industries with higher claim frequency. In that case, you want to confirm your mod is being used. If your history has some rough years, the PEO’s master mod might actually work in your favor. The point is to ask the question directly rather than assume.
Pooled risk cuts both ways. If you’re a low-risk operation with clean history and your class codes are correctly assigned, pooling can mean you’re effectively subsidizing higher-risk clients on the same master policy. That’s the hidden cost that rarely gets discussed in PEO sales conversations. On the other hand, if you operate in genuinely high-risk codes and your individual mod is elevated, access to the PEO’s master policy rate can represent real savings. Understanding the full risk transfer framework is essential before making assumptions about whether pooling benefits you.
Understanding which scenario applies to you is the foundation for the cost model you’ll build in the next step.
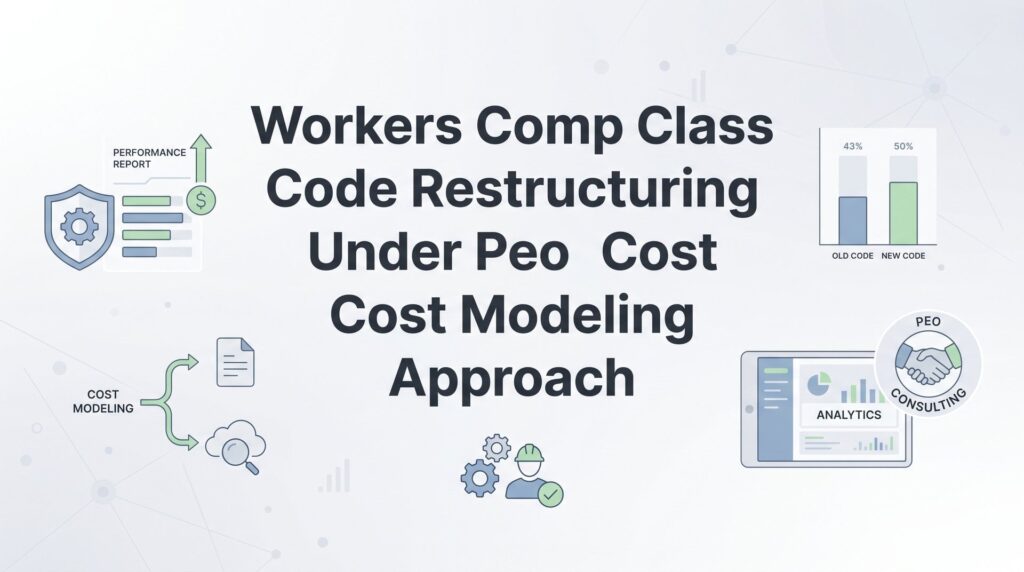
Step 4: Build a Side-by-Side Cost Model Comparing Current vs. Restructured Codes
The cost model doesn’t need to be complex. The core formula is straightforward: payroll allocated to each class code, multiplied by the rate per $100 of payroll, multiplied by the applicable experience mod factor. Run that calculation for every code in your current setup, then run it again with your proposed restructured assignments.
Start with your current state. Take the payroll figures from your baseline (Step 1) and apply the current rates and mod. This gives you your actual workers’ comp cost as it stands today, or as close to it as your documentation allows.
Then build the restructured scenario. Use the corrected class code mapping from Step 2. For any employees you’re moving from a higher-risk code to a more accurate lower-risk code, apply the rate that corresponds to that code. For employees you’re correctly separating into clerical or outside sales classifications, apply those rates instead.
The difference between these two scenarios is your estimated savings from classification accuracy alone. In businesses with significant payroll in clerical or supervisory roles that have been sitting in trade codes, this number can be meaningful.
Now layer in the PEO-specific variables. If you’re comparing a standalone policy to a PEO arrangement, you need to add the PEO’s admin fee to the PEO-side calculation. Some PEOs also offer pay-as-you-go premium structures, which eliminate large upfront deposits and can improve cash flow even if the annual cost is similar. A detailed workers’ comp premium calculation walkthrough can help you verify whether the numbers your PEO provides actually hold up.
If the PEO uses bundled pricing, ask them to provide a code-level rate breakdown so you can do this comparison accurately. If they can’t or won’t provide that breakdown, you’re working blind, and that’s a problem we’ll address in Step 5.
One important framing point: restructuring class codes is not about finding creative ways to underclassify your workforce. It’s about correcting genuine misclassifications that inflate your cost. Intentional misclassification exposes you to audit penalties and potential policy cancellation. The goal here is accuracy, and accuracy almost always reveals overpayment rather than underpayment in businesses that haven’t done this analysis before.
Step 5: Negotiate Code Assignments and Pricing Transparency With Your PEO
By this point, you have everything you need to have a substantive conversation with your PEO: your role-to-code mapping, your loss run history, and a cost model showing the difference between current and corrected classifications.
Bring all of it to the table. The mapping document shows you’ve done the work and aren’t guessing. The loss runs demonstrate your actual risk profile. The cost model shows what accurate classification should look like. This is a professional, documented position, not a complaint.
The key questions to ask directly:
Will my individual experience mod be applied, or the PEO’s master policy mod? Get this in writing. The answer affects your cost calculation significantly, and the answer can change at renewal if you don’t have it documented.
How are class code rates set on the master policy? Are they NCCI manual rates? Negotiated carrier rates? Blended across the client pool? You’re trying to understand whether the rates you’re being quoted reflect your actual risk profile or an averaged rate across a broader client mix. Understanding the underwriting risk review process helps you anticipate how carriers evaluate your account within the PEO’s master policy.
Can you provide a code-level rate breakdown? This is the transparency test. A PEO using pass-through pricing should be able to provide this without hesitation. A PEO using bundled pricing may push back. If they can’t show you what you’re paying per class code, you can’t verify whether your restructured classifications are actually producing savings.
Watch for vague language in proposals. Phrases like “workers’ comp included” or “comprehensive coverage” without any code-level detail are red flags. They may indicate that workers’ comp is being bundled in a way that makes accurate cost comparison impossible, which often means the pricing isn’t competitive on that component.
Some PEOs resist code-level transparency because their master policy rates aren’t favorable for certain classifications, or because bundled pricing gives them margin they’d rather not expose. That resistance tells you something. A PEO confident in their pricing model shouldn’t have a problem showing you the detail. If you’re approaching a renewal, running a thorough renewal risk analysis before signing gives you the leverage to push for better terms.
Step 6: Validate Annually and Track Claims Against Code Accuracy
Class code restructuring is not a one-time event. Roles evolve, payroll shifts between functions, and new positions get created without a formal classification review. Without an annual audit cadence, the drift back toward miscoded employees happens quietly.
Set a recurring review on your calendar, ideally tied to your policy renewal cycle. Each year, re-run the role-to-code mapping for any positions that have changed. Review your loss runs to confirm that claims are being filed under the correct codes. Recalculate your cost model with updated payroll figures and current rates.
Claims filed under incorrect codes are a specific problem worth calling out. If an employee coded under a lower-risk classification files a claim for an injury that occurred while performing higher-risk duties, that’s a classification accuracy issue that can create both coverage disputes and mod rate complications. The reverse is also true: if an employee is overcoded and files a claim, the claim inflates your mod rate in a code that may not accurately reflect their work. Accuracy protects you in both directions.
When you find discrepancies during your annual review, the first step is to raise them with your PEO account manager and document the conversation. Most legitimate corrections can be handled at the PEO level. If you’re getting pushback on corrections that are clearly supported by the Scopes Manual or your state bureau’s rules, you have the option to escalate to the carrier directly or, in some cases, to your state’s workers’ comp rating bureau. Knowing how to properly reconcile your payroll audit is a critical part of catching these discrepancies before they compound.
The businesses that get the most long-term value from PEO workers’ comp arrangements are the ones that treat it as an ongoing operational process rather than a setup-and-forget contract.
Your Class Code Audit Checklist
Here’s a quick reference for everything covered in this guide:
Step 1 — Baseline Documentation: Request experience mod worksheet, loss runs, and current class code schedule with payroll allocations and rates per $100.
Step 2 — Role Mapping: Build a role-to-code spreadsheet using NCCI Scopes Manual or state bureau rules. Apply governing classification rule, identify standard exceptions (8810 clerical, 8742 outside sales), and document dual-duty employees.
Step 3 — PEO Policy Analysis: Confirm whether pass-through or bundled pricing applies. Determine whether your individual mod or the PEO’s master mod is being used. Assess whether pooled risk helps or hurts your specific situation.
Step 4 — Cost Model: Run payroll × rate × mod for both current and restructured scenarios. Layer in admin fees, pay-as-you-go structures, and any safety credits. Quantify the difference.
Step 5 — Negotiation: Bring your documentation to the table. Ask directly about mod application, rate-setting methodology, and code-level breakdowns. Treat resistance to transparency as a signal.
Step 6 — Annual Validation: Schedule recurring reviews tied to renewal. Re-map changed roles, review claims against codes, recalculate cost model with current figures.
Workers’ comp class code accuracy is one of the most overlooked cost levers in PEO arrangements, and comparing PEO providers specifically on workers’ comp transparency and pricing structure is something most businesses skip entirely. That’s where a significant amount of money gets left on the table.
Before you sign that PEO renewal, make sure you’re not leaving money on the table. Many businesses unknowingly overpay because of bundled fees, hidden administrative markups, and contracts designed to limit flexibility. At PEO Metrics, we give you a clear, side-by-side breakdown of pricing, services, and contract terms so you can see exactly what you’re paying for and choose the option that truly fits your business. Don’t auto-renew. Make an informed, confident decision.