
Open enrollment sounds manageable until you’re actually in it. Deadlines stacking up, employees asking questions nobody prepared answers for, and a PEO portal that works differently than you expected. If you’ve been through this once, you know the feeling.
Running benefits through a PEO changes the process in real ways. Your PEO handles carrier negotiations, plan administration, and compliance filings — that’s the whole point. But the coordination between your team and the PEO is more involved than most businesses realize going in. Miss a handoff, and you’re dealing with enrollment errors, confused employees, and deduction mismatches well into Q1.
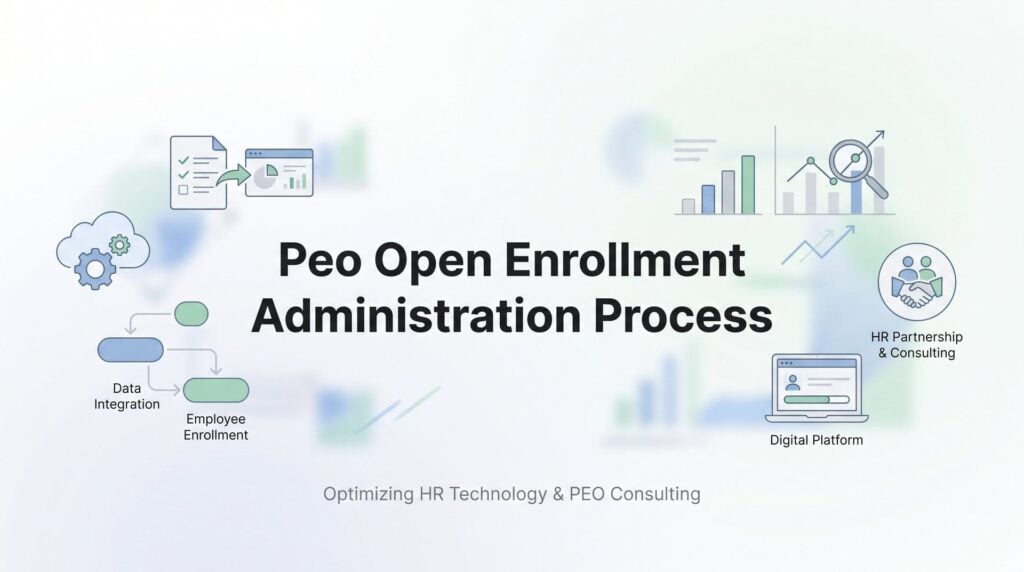
This guide walks through the actual mechanics of PEO open enrollment administration: the timeline, the decisions, the places where things break down, and what you can do about them. It’s written for business owners and HR leads who are already working with a PEO, or actively evaluating one, and want to understand what the process looks like on the ground — not in a brochure.
If you’re still working through whether a PEO is the right fit for your benefits administration overall, our foundational guides cover that broader question. This page focuses specifically on the enrollment process itself, from the pre-renewal planning most businesses skip to the post-enrollment reconciliation that catches what slipped through.
Step 1: Start the Renewal Conversation 90 Days Out
Most businesses wait until the PEO sends them something. That’s the wrong instinct. By the time your PEO’s renewal packet lands in your inbox, a lot of decisions have already been made — carrier negotiations are largely complete, plan designs are set, and your window to influence anything meaningful is closing fast.
The 90-day mark before your plan year renews is when you want to be having proactive conversations. PEOs negotiate group rates on their own cycles, pooling employees across their client base to get volume pricing. That process happens upstream of your renewal — and if you’re not engaged early, you’re just accepting whatever they’ve already locked in.
Here’s what to request at the 90-day mark:
Claims utilization data: How did your employee population actually use benefits this past year? High utilization in certain categories can signal what plan designs make sense going forward. Some PEOs share this readily; others are vague about it. If yours won’t provide any utilization context, that’s worth noting.
Renewal rate projections: What’s the PEO projecting for premium increases? You want this number before the official renewal packet, not at the same time. It gives you room to ask questions, push back if something looks off, or start modeling contribution scenarios with realistic numbers. Running a PEO cost variance analysis at this stage helps you spot where costs are shifting before you commit.
Planned changes to the plan lineup: Is the PEO adding, dropping, or redesigning any plan tiers? Some PEOs offer a fixed menu of options — you pick from what they’ve built. Others allow more customization. Understanding which kind you’re working with shapes everything downstream, from how you communicate with employees to how you structure employer contributions.
There’s a meaningful difference between PEOs that let you tailor plan tiers to your workforce and those running a standardized catalog. Neither is inherently wrong, but the fixed-menu model means your flexibility is limited. If your workforce skews younger and healthier, you might want a leaner HDHP option with strong HSA contribution matching. If you have a lot of families on the plan, richer coverage matters more. Knowing early whether you can influence the lineup — or whether you’re working with what the PEO has already decided — is critical information.
One clear red flag: if your PEO won’t share utilization data or renewal projections at all, that’s a transparency problem. You’re the employer of record in important ways, and you have a legitimate interest in understanding what’s driving your costs. A good PEO account manager treats this as a normal conversation. If yours treats it like a sensitive request, that tells you something about how the relationship is structured — and it may signal deeper PEO expense visibility challenges worth investigating.
Step 2: Lock In Your Plan Options and Contribution Strategy
Once you have renewal projections and a clear picture of what the PEO is offering, the real decision-making starts. This step is about choosing what you’re going to offer employees and what you’re going to pay for it.
Most PEOs bring a set of health plan options — typically HMO, PPO, and HDHP tiers — plus ancillary benefits like dental, vision, life, and disability. Voluntary add-ons (accident coverage, critical illness, hospital indemnity) are increasingly common as well. Review each category with the same questions: what changed from last year, what costs more, and does the value still hold up for your employee population? For a deeper look at what PEOs typically cover, our guide on PEO benefits administration breaks down the full scope.
The contribution math is where business owners often get tripped up. PEO pricing models vary. Some charge a per-employee-per-month (PEPM) fee that bundles administrative costs separately from benefits premiums. Others use a percentage-of-payroll model. The structure affects how you think about your total cost per employee and how you calculate what you’re actually contributing toward coverage vs. paying in administrative fees.
When you’re setting employer contribution levels, be explicit about what you’re deciding:
Flat dollar contribution: You cover a fixed amount per employee per month, regardless of which plan they choose. Simple to communicate, but can feel inequitable if plan costs vary significantly.
Percentage of premium: You cover a set percentage of whatever plan the employee selects. More flexible for employees, but harder to budget precisely when plan costs differ.
Tiered contributions by plan: You contribute different amounts depending on which tier the employee chooses, often to steer employees toward more cost-effective options. Requires clear communication to avoid confusion.
Compare this year’s offerings against last year’s deliberately. Don’t just look at the premium line — look at deductibles, out-of-pocket maximums, network changes, and any formulary updates on prescription coverage. A plan that looks similar in premium can be meaningfully different in actual employee cost if the deductible went up.
On the question of pushing back versus accepting the PEO’s default lineup: the group rate advantage is real. PEOs pool employees across dozens or hundreds of client companies, which gives them negotiating leverage that a 50-person business simply doesn’t have on its own. That’s a genuine benefit. But it’s not unlimited. If the plan options don’t fit your workforce, or if the pricing feels opaque, you’re entitled to ask questions and request alternatives. Knowing how to negotiate your PEO contract gives you leverage in these conversations.
Step 3: Build the Communication Plan Before the Portal Opens
Here’s something that gets overlooked every year: most enrollment confusion isn’t caused by bad benefits. It’s caused by poor communication. Employees don’t understand what changed, don’t know what they’re choosing between, and don’t realize what the deadline actually means for them. That’s a fixable problem — but only if you address it before the portal opens, not after.
Your PEO will handle system notifications, plan documents, and summary plan descriptions. That’s their lane. But the “why this matters to you” messaging? That’s yours. Employees trust their employer to explain what’s actually relevant to their situation, not just to forward a PDF from the insurance carrier.
A few communication formats that actually work:
Short video walkthroughs: A 3-5 minute screen recording walking through the enrollment portal, showing where to find plan comparisons and how to add dependents, reduces support questions dramatically. You don’t need production value. You need clarity.
One-page comparison sheets: Side-by-side summaries of the plans you’re offering, showing premium cost to the employee, deductible, out-of-pocket max, and whether the plan includes an HSA option. One page. Not the full Summary of Benefits and Coverage document — a readable summary you create for your specific workforce.
Live Q&A sessions: Even a 30-minute open Zoom where employees can ask questions live is worth doing. It surfaces the confusions you didn’t anticipate, and it signals that you take this seriously. Record it for employees who can’t attend.
Set clear deadlines and be explicit about what happens if someone misses the enrollment window. Under most PEO systems, employees who miss open enrollment default to either their prior-year elections or waived coverage, depending on the plan and the PEO’s configuration. Employees often don’t know this. Telling them clearly — “if you don’t actively elect by November 15, you’ll be defaulted to X” — motivates action in a way that a generic reminder doesn’t.
Coordinate with your PEO on timing. If your PEO uses a proprietary HRIS platform, understanding how it handles enrollment notifications is important — our guide on PEO integration with HRIS platforms covers how these systems connect. Make sure your internal communications go out before or alongside the system-generated notifications, not after. Employees who get a portal login email before they’ve heard anything from their employer tend to ignore it or get anxious about it.
Step 4: Manage the Active Enrollment Window
The enrollment window is open. Now your job shifts from planning to monitoring.
PEO enrollment portals vary a lot in quality. Larger PEOs — ADP TotalSource, Insperity, Paychex PEO — run proprietary HRIS platforms with self-service enrollment built in. Smaller regional PEOs may use third-party platforms, and some still rely on more manual processes than you’d expect. Know what your employees are walking into before the window opens. If the portal is clunky, build that into your communication plan and set expectations accordingly. Comparing what different providers offer is part of choosing the right PEO in the first place.
Your role during the active window is threefold:
Monitor completion rates: Most PEO systems give you an admin view showing who has and hasn’t completed enrollment. Check it regularly — not just at the deadline. If you’re at 40% completion with five days left, you have time to act. If you wait until the last day, you don’t.
Chase stragglers directly: A personal message from a manager or HR contact converts better than another system reminder. Identify employees who haven’t enrolled and have someone reach out to them specifically. “Hey, I noticed you haven’t completed your benefits enrollment yet — the deadline is Friday and I want to make sure you don’t lose coverage” is more effective than a mass email blast.
Field the questions your PEO won’t answer: The PEO’s support line handles system issues and plan document questions. They won’t explain your company’s contribution philosophy or help an employee decide between a PPO and an HDHP based on their family situation. That’s your role. Be available for it.
Common errors to watch for during the window: employees accidentally waiving coverage when they meant to waive only a specific tier, dependents being added without the required documentation uploaded, and HSA or FSA elections left blank when the employee intended to contribute. These errors are much easier to catch and fix during the window than after it closes.
Schedule a mid-enrollment check-in with your PEO account manager. Don’t wait until the deadline to surface problems. If there are technical issues with the portal, enrollment counts that look off, or employees reporting confusion about specific plan details, you want those conversations happening in the middle of the window — when there’s still time to do something about them. If issues escalate, knowing the PEO dispute resolution process can help you navigate disagreements effectively.
Step 5: Handle Edge Cases and Compliance Requirements
This is the step most businesses underinvest in, and it’s where exposure accumulates quietly.
ACA compliance doesn’t go away because you have a PEO. The co-employment model shifts some administrative responsibilities to the PEO — and Certified PEOs (CPEOs) have specific IRS-recognized responsibilities around certain tax filings — but the client company retains meaningful compliance accountability. Understanding the distinction between a CPEO vs a standard PEO matters here, because it affects who bears responsibility for specific filings. Specifically: you’re responsible for ensuring that ACA affordability thresholds are met for your workforce, that full-time equivalent tracking is accurate, and that 1095-C forms are prepared correctly.
Most PEOs handle 1095-C preparation as part of their service. That’s helpful. But “they prepare it” doesn’t mean “you don’t need to verify it.” Review the 1095-C data before it goes out. Errors in affordability calculations or coverage codes can trigger IRS penalties that land on you, not the PEO. Confirm explicitly what your PEO’s service agreement says about ACA compliance responsibilities and where their obligation ends.
Employees who miss the enrollment window are a recurring headache. Once the window closes, your PEO can generally only process changes for qualifying life events — marriage, birth, adoption, loss of other coverage, and similar triggers. There’s no administrative grace for “I forgot.” Make sure employees understand this before the window closes, not after.
State-specific requirements add another layer. States like California, New York, and Massachusetts have continuation coverage rules and notice requirements that go beyond federal COBRA. Whether your PEO handles these automatically depends entirely on your service agreement. Don’t assume. Pull the agreement, find the section on state-specific compliance, and confirm what’s covered. Our breakdown of what’s in a PEO service agreement can help you know what to look for. If it’s not explicit, ask your account manager in writing and get a clear answer.
COBRA and continuation coverage during transitions — when an employee leaves, when you add a new location in a different state, or when you’re switching PEOs — is another area where responsibility boundaries get blurry. Know exactly what your PEO administers on the COBRA side and what falls back to you. This is especially relevant if you’re mid-year and considering a PEO switch, since benefits continuity during a transition requires careful coordination.
Step 6: Reconcile Enrollments and Verify First Deductions
The enrollment window closes. Most businesses breathe a sigh of relief and move on. That’s a mistake.
The first payroll run after open enrollment is where errors surface. Mismatched deductions, employees showing up with the wrong plan assigned, dependents who completed enrollment but didn’t get properly confirmed with the carrier — these problems don’t announce themselves. You have to go looking for them.
Run a side-by-side reconciliation. Pull your PEO’s enrollment confirmation report and compare it against your internal headcount and the elections you expected based on what employees submitted. Look for discrepancies: employees who enrolled but aren’t showing up in the confirmation, elections that don’t match what you communicated, or deduction amounts that don’t align with the contribution structure you set. Understanding how PEOs affect your labor cost reporting helps you spot deduction mismatches faster.
Carrier confirmation is a separate check. Your PEO submits enrollments to the carriers on your behalf, but carrier systems have their own processing timelines and their own error rates. An employee might be confirmed in your PEO’s system but not yet active in the carrier’s roster. If that employee tries to use their benefits before the carrier has processed them, they’ll hit a wall.
The way to catch this: verify that employees actually appear on carrier rosters, not just in the PEO portal. For health insurance specifically, employees can call the carrier’s member services line to confirm their enrollment. For a full-company verification, request a carrier eligibility file from your PEO and cross-reference it against your enrollment report.
Set a 30-day post-enrollment review checkpoint with your PEO account manager. Put it on the calendar now, before the chaos of Q1 takes over. This checkpoint exists to surface anything that slipped through: deduction corrections that need processing, employees who reported enrollment issues after the fact, or carrier discrepancies that emerged after the initial submission. Catching these in January is much better than catching them in March.
Putting It All Together
Open enrollment through a PEO is genuinely easier than managing benefits entirely in-house. The group rate access, the compliance infrastructure, the carrier relationships — those are real advantages. But easier isn’t the same as automatic, and the businesses that have smooth enrollments are the ones that stay actively involved in the process.
Here’s a quick checklist to keep handy as you work through your next enrollment cycle:
90 days out: Initiate the renewal conversation with your PEO. Request utilization data, renewal rate projections, and any planned changes to the plan lineup.
60-75 days out: Review plan options, set contribution levels, and lock in your benefit strategy before the enrollment portal opens.
30-45 days out: Build your employee communication plan. Create comparison materials, schedule Q&A sessions, and coordinate timing with your PEO’s system notifications.
During the window: Monitor completion rates actively, chase stragglers directly, and schedule a mid-enrollment check-in with your account manager.
Before close: Address edge cases proactively — employees at risk of missing the deadline, state-specific compliance requirements, and any open questions on ACA responsibilities.
Post-enrollment: Reconcile enrollment reports against payroll and carrier records. Set a 30-day review checkpoint to catch what slipped through.
If your current PEO makes any of these steps harder than they should be — if you’re not getting transparency on renewal rates, if the technology makes enrollment painful for employees, or if your account manager is hard to reach when it matters — that’s worth examining seriously. Not all PEOs handle open enrollment with the same level of support, technology, or transparency. The difference shows up most clearly during the enrollment window and in that first post-enrollment payroll run.
Don’t auto-renew. Make an informed, confident decision. Before you sign that PEO renewal, make sure you’re not leaving money on the table. Bundled fees, administrative markups, and contracts designed to limit flexibility add up — and most businesses don’t realize it until they compare. We give you a clear, side-by-side breakdown of pricing, services, and contract terms so you can see exactly what you’re paying for.